The 16.6 release of OrCAD Capture/Capture-CIS provides several areas for you to customize the environment.
Read on for more details …
Customized Tooltips
You can now utilize TCL that can override the Tooltip being displayed.
Try this example:
1. Enter the following TCL commands in the Capture TCL Command window -
proc CustomToolTipForPageObjectsEnabler {args} {
return true;
}
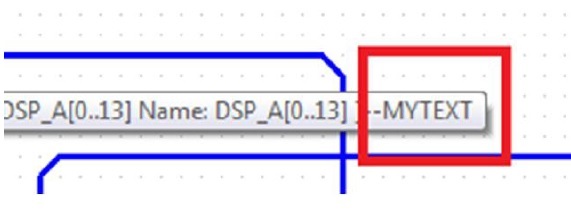
proc GetCustomToolTipForPageObjects {pObj pSchOcc pName} {
return "${pName}--MYTEXT"
}
RegisterAction _cdnGetCustomToolTipForPageObjects CustomToolTipForPageObjectsEnabler
"" GetCustomToolTipForPageObjects "";
2. Check that the tooltip now displays the user-defined text:
3. Close OrCAD Capture
4. Copy the file (one that contains the lines from item #1 above) to <hier>\tools\capture\capAutoLoad
5. Re-launch OrCAD Capture. Note the file is auto-loaded into OrCAD Capture and the modified tooltip is available.
Configuring the CIS GUI
You can now select different colors for different CIS rows based on property values. The configuration of the fields can also be multi-valued.
Consider this example:
1. Edit a file called CISRowColor:
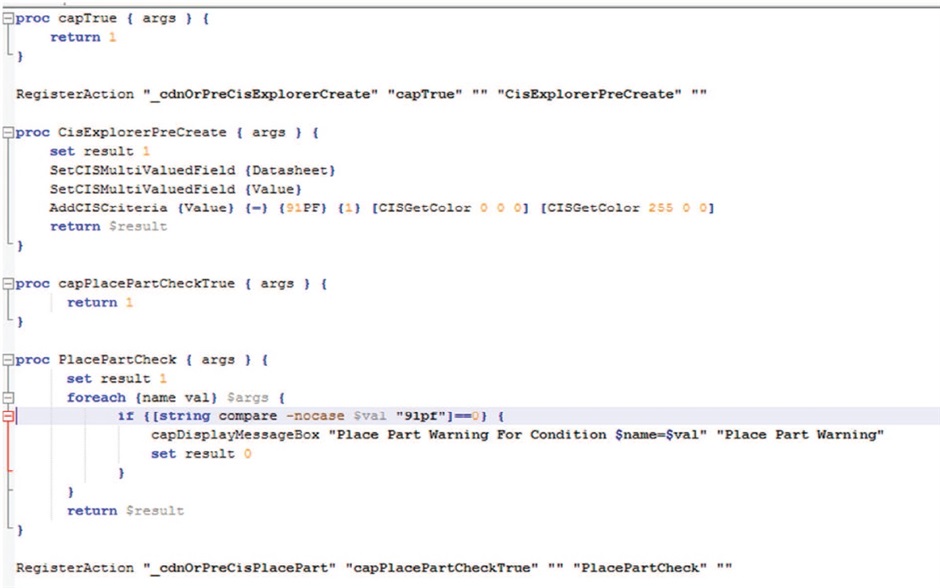
2. Launch OrCAD Capture and copy-paste the contents of the file in the TCL Command Window
3. Open the Bench_allegro design from the $CDSROOT\tools\capture\samples folder and launch the CIS browser with the Place Database
Command. Observe the rows are colored based on the rules listed above (for example, blue is a recommended part and red is not recommended):

4. Try to place a capacitor with a 91PF value – CIS displays an error.
You can customize part placement checks:
- For example - Configure to disable placement of an EOL part
- For example - Configure to warn a user if part procurement has long lead time
Adding Menus and Toolbars
The following executables – Capture, PSpice, Model Editor, and Advanced Analysis allow the addition of user-defined menus and toolbars. The earlier limitation where an open project was required for a menu to be enabled has been removed.
Consider this example:
1. Copy and paste the contents below to the TCL command window -
proc PMRMBMenu {} {
capDisplayMessageBox "This is RMB Menu on PM" "RMB Action"
}
RegisterAction "MyPMMenu" "return 1" "Ctrl+r" "PMRMBMenu" PM
proc SchematicRMBMenu {} {
capDisplayMessageBox "This is RMB Menu on Schematic" "Schematic RMB
Action"
}
RegisterAction "SchematicRMBMenu" "return 1" "Ctrl+r" "SchematicRMBMenu"
Schematic
InsertXMLMenu [list [list "TopLevelMenu"] "" "" [list "popup" "&TopLevelMenu" "0"]]
InsertXMLMenu [list [list "TopLevelMenu" "SubMenu" ] "" "" [list "action"
"&SubMenu..." "0" "SubMenuActionLabel" "MenuUpdateLabel"]]
proc SubMenuActionCallback {} {
set lMessage "SubMenu Action Called"
set lMessageStr [DboTclHelper_sMakeCString $lMessage]
DboState_WriteToSessionLog $lMessageStr
return true
}
RegisterAction "MenuUpdateLabel" "capTrue" "" "capTrue" ""
RegisterAction "SubMenuActionLabel" "capTrue" "" "SubMenuActionCallback" ""
2. Verify three menus are added:
a. RMB of project manager
b. RMB of schematic
c. Top-level menu
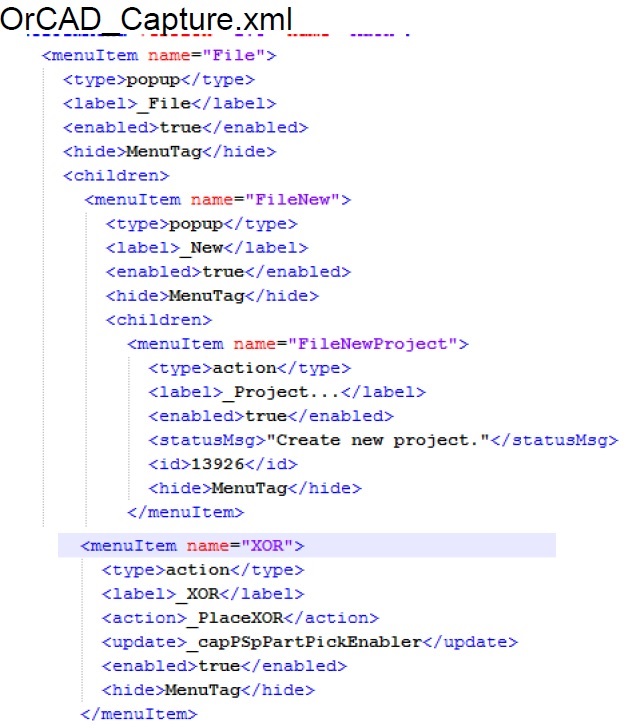
Menu files are located in $CDSROOT\share\orResources, and they Include icons for toolbars. A menu can be added statically through XML or dynamically through TCL.
Menu tags can be:
• menuItem
• Type – pop/action
• label
• enabled
• statusMsg
• id
• hide
• separator
• update
For callback methods, see $CDSROOT\tools\capture\tclscripts\capAutoLoad\capTCLMenu.tcl
Menu contexts can be:
• PROJECT_MANAGER_VIEW
• PART_VIEW
• SCHEMATIC_VIEW
• PROPERTY_EDITOR_VIEW
• HTML_VIEW
• LOG_VIEW
• SYMBOL_VIEW
• VHDL_VIEW
• TEXT_VIEW
• VERILOG_VIEW
Please share your experiences using these new features.
Jerry “GenPart” Grzenia